准备测试
最后修改时间:2023 年 10 月 27 日IntelliJ IDEA 可与多个开箱即用的 Java 测试框架配合使用,例如JUnit、Spock、TestNG或Cucumber。
在IDE中,您可以直接从源代码以及必要的测试方法创建测试类。您可以使用快捷方式在测试类和源代码之间切换、运行多个测试、查看每个测试的统计信息以及将测试结果导出到文件。
IntelliJ IDEA 还具有代码覆盖率功能,可让您分析代码并了解测试覆盖了代码的哪些区域以及哪些区域需要更多测试。
有关用其他语言测试代码的更多信息,请参阅:
测试 PHP(PhpStorm 文档)
添加测试库
IntelliJ IDEA 允许您在编码时添加缺少的库:一旦 IDE 检测到您正在使用库中尚未添加到项目中的某些代码,它将提示您下载并安装它。
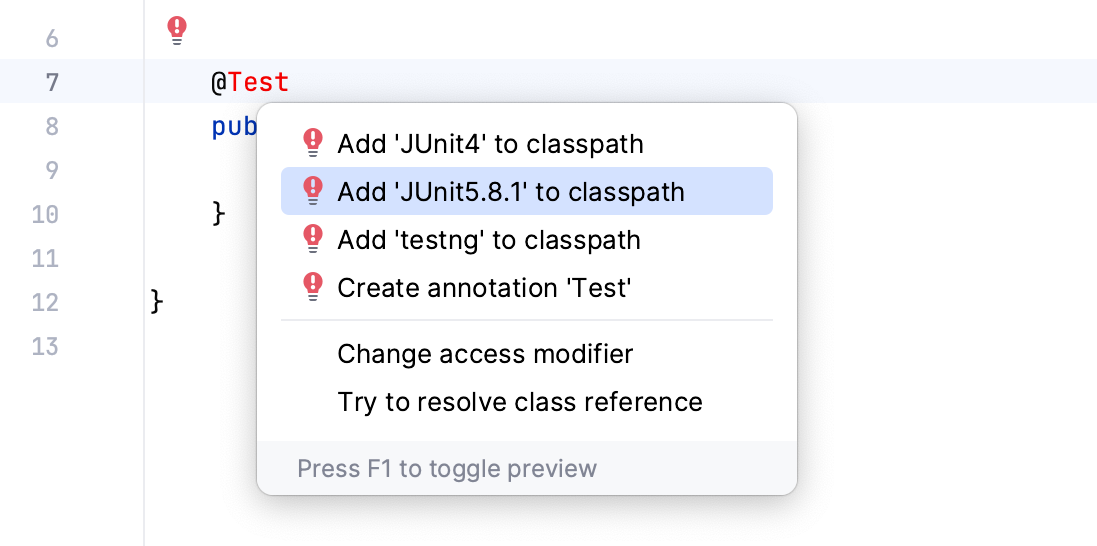
您还可以手动将库添加到项目中。例如,如果您需要特定的库版本或发行版,这可能会很有帮助。
手动添加测试库
如果您使用本机 IntelliJ IDEA 构建器构建项目,请按照以下步骤添加库:
转到文件| 项目结构( ) 或单击工具栏上的 。CtrlAltShift0S
在“项目设置”下,选择“库”并单击
| 来自马文。
在打开的对话框中,指定必要的库工件,例如:
org.junit.jupiter:junit-jupiter:5.9.1。单击“应用”保存更改并关闭对话框。
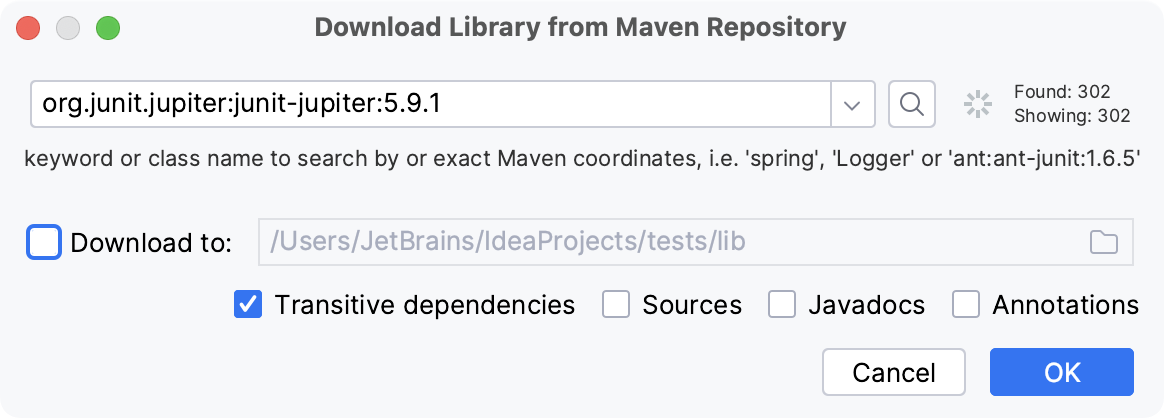
IntelliJ IDEA allows you to add missing libraries as you code: once the IDE detects that you're using some code from the library that is not added to your project yet, it will prompt you to download it. In this case, the IDE automatically adds the necessary dependencies to your pom.xml.

You can also add libraries to your project manually. For example, this can be helpful if you need a specific library version or distribution.
Add libraries using the Dependencies tool window
Follow these steps if you're using Maven in your project:
In your pom.xml, press AltInsert and select Dependency.
In the Maven Artifact Search tool window, type the name of the required dependency, for example:
org.junit.jupiter:junit-jupiter. In the list of results, select the one you need and click Add.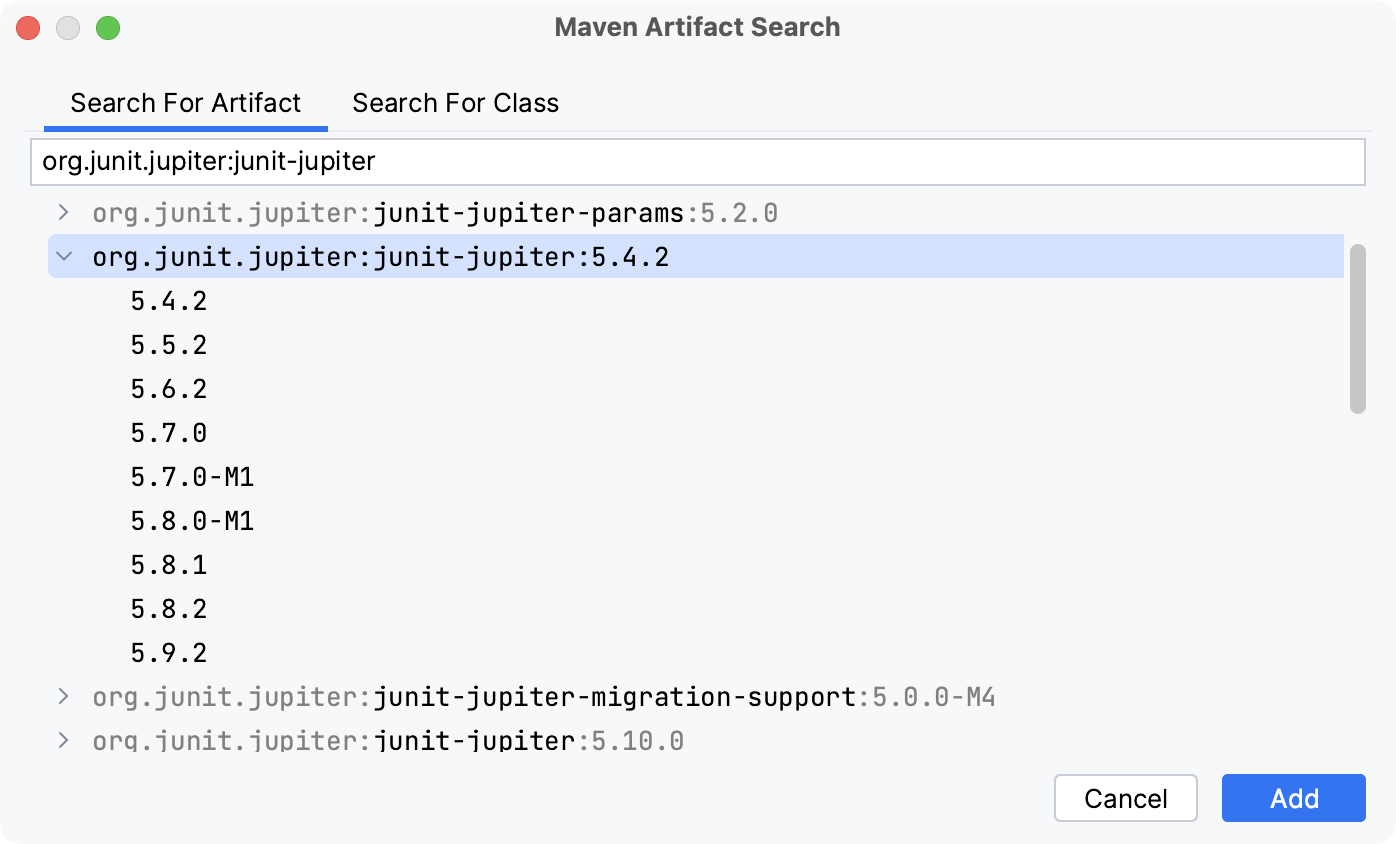
When the dependency is added to pom.xml, press CtrlShift0O or click
in the Maven tool window to import the changes.
For more information about working with Maven, refer to Maven dependencies.
In Gradle projects, add the necessary dependencies to your build file manually.
In your build.gradle, press AltInsert and select Add Maven artifact dependency.
In the Maven Artifact Search tool window, type the name of the required dependency, for example:
org.junit.jupiter:junit-jupiter. In the list of results, select the one you need and click Add.
When the dependency is added to build.gradle, press CtrlShift0O or click
in the Gradle tool window to import the changes.
测试源根
在开始创建测试之前,请确保为您的项目配置了测试源根目录。测试源根目录是存储测试代码的文件夹。在项目工具窗口中,该文件夹标有 图标。
IDE 以不同的方式处理来自不同来源的代码。例如,源和测试源的编译结果通常放置在不同的文件夹中。这就是为什么,如果测试源根丢失,您需要创建一个。否则,您的代码可能会被错误处理。
为您的项目创建测试根目录
如果您使用本机 IntelliJ IDEA 构建器构建项目,请按照以下步骤操作:
在项目工具窗口 ( ) 中,创建一个新目录,用于存储测试代码。Alt01
右键单击新目录并选择将目录标记为 | 测试源根。
测试文件夹应标有 图标
。
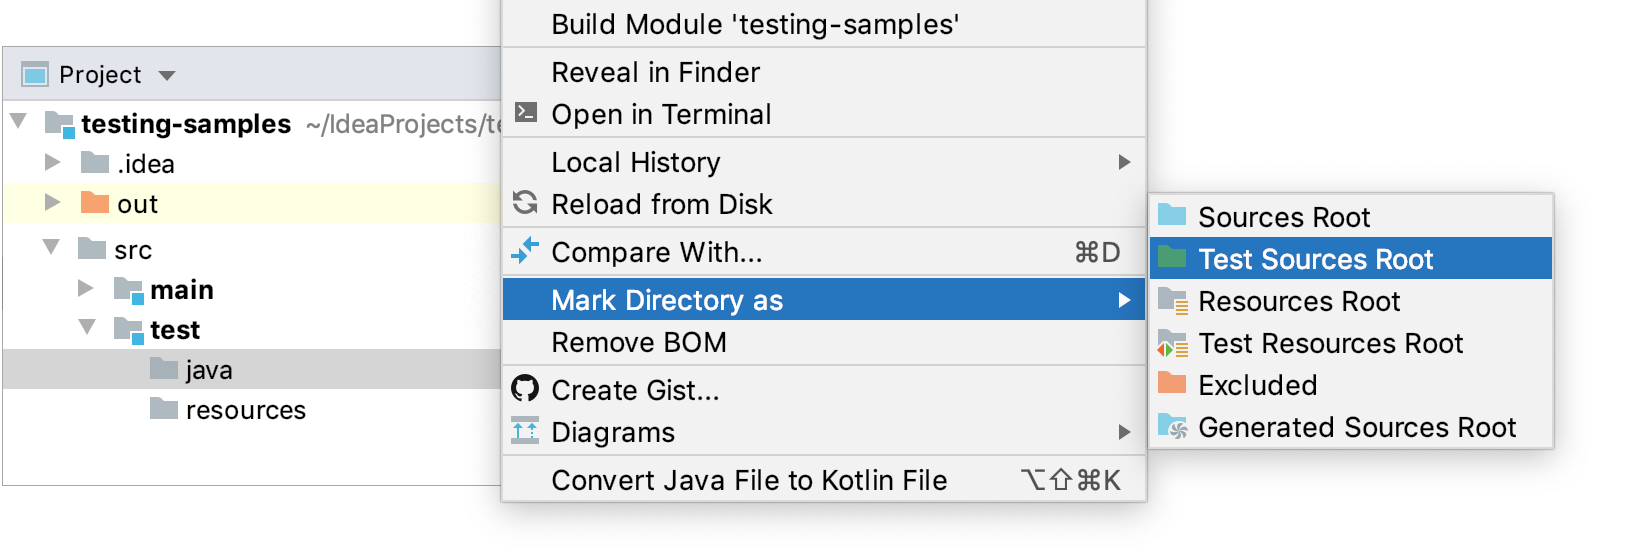
Maven uses a standard directory layout for applications. Generally, it's recommended that you conform to this layout in your projects. For example, when you create a test folder in IntelliJ IDEA for a Maven project, the IDE suggests setting the standard name and location for such a folder. In this case, the IDE is also already aware that this test folder is your Test Sources Root.
However, you can override the standard directory layout by modifying the build file.
Change the test root
In the Project tool window (Alt01), create a new directory in which you will store your test code.
In your pom.xml, change the
testSourceDirectoryelement.Replace src
/new-test with the path to the new folder that you want to use as a test root./test <build> <testSourceDirectory>src/new-test/test</testSourceDirectory> </build>Press CtrlShift0O or click
in the Maven tool window to import the changes.
The new test root should be marked with the icon in the Project tool window.
Just like Maven, Gradle also has a strict project directory layout. When you create a test folder in IntelliJ IDEA for a Gradle project, the IDE suggests setting the standard name and location for such a folder. In this case, the IDE is also already aware that this test folder is your Test Sources Root.
However, you can override the standard directory layout by modifying the build file.
Use another test root
In the Project tool window (Alt01), create a new directory in which you will store your test code.
Open your build.gradle and add the following code.
Replace src
/new-test with the path to the new folder that you want to use as a test root./test sourceSets { test { java { srcDirs = ['src/new-test/test'] } } }Press CtrlShift0O or click
in the Gradle tool window to import the changes.
Add one more test root
In the Project tool window (Alt01), create a new directory in which you will store your test code.
Open your build.gradle and add the following code.
Replace src
/new-test with the path to the new folder that you want to use as a test root./test sourceSets { test { java { srcDir 'src/new-test/test' } } }Press CtrlShift0O or click
in the Gradle tool window to import the changes.
The new test root should be marked with the icon in the Project tool window.
有关不同类型文件夹的更多信息,请参阅文件夹类别。
测试资源根
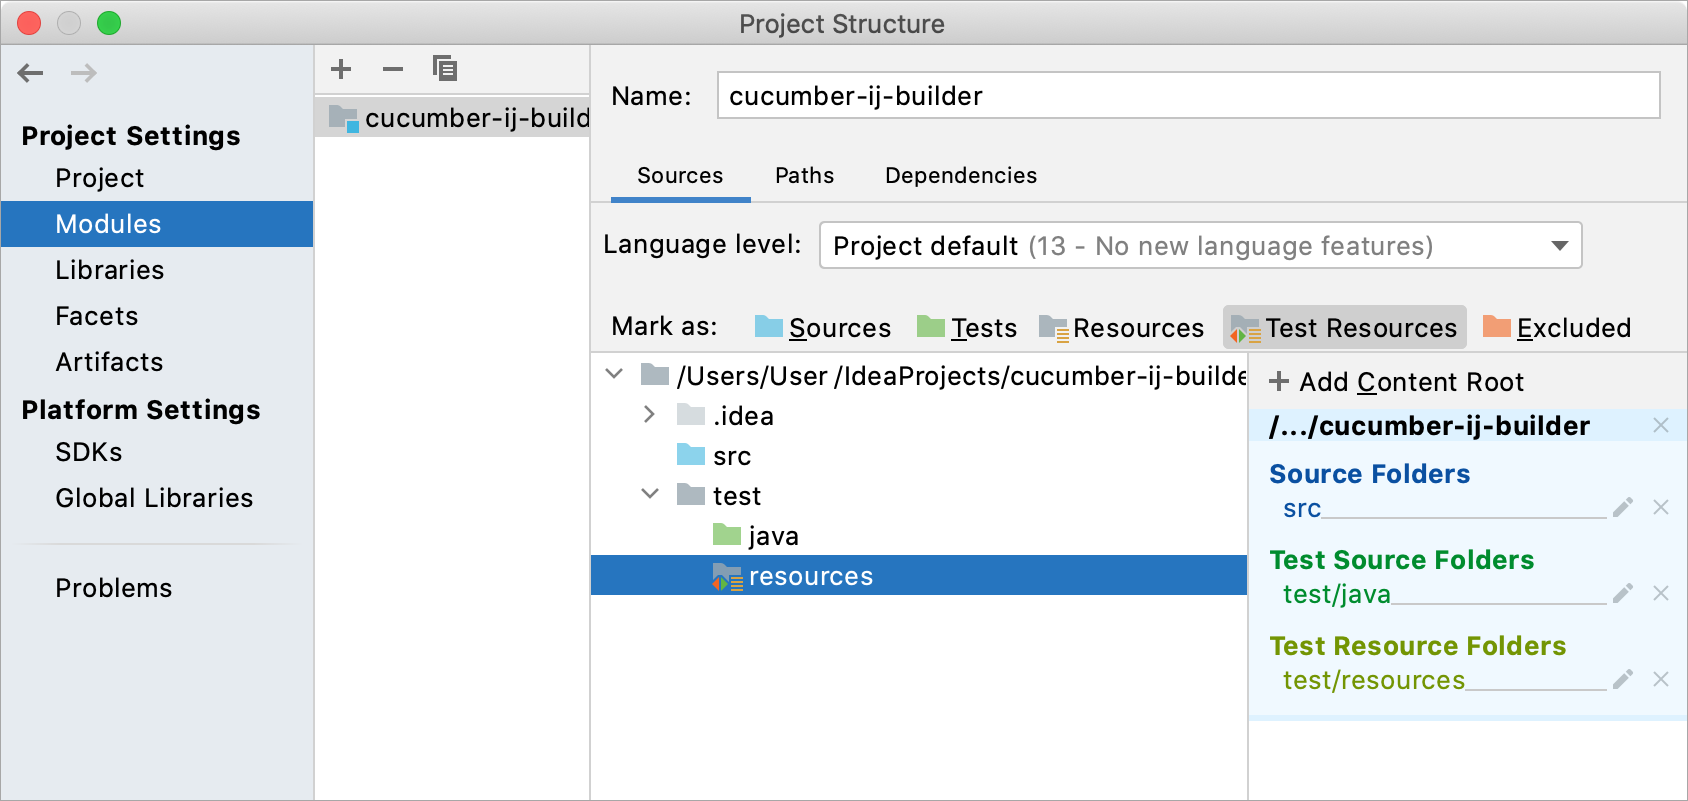
测试资源根是存储与测试源关联的文件的文件夹。在“项目”工具窗口中,该文件夹位于测试根目录中,并标有。
对于 Maven 和 Gradle 项目,测试资源文件夹通常是自动创建的。如果您使用本机 IntelliJ IDEA 构建器构建项目,则可能需要手动创建资源根。
配置测试资源的文件夹
转到文件| 项目结构( ) 或单击工具栏上的 。CtrlAltShift0S
在Project Settings下,单击Modules,然后打开右侧的Sources选项卡。
右键单击测试文件夹并选择新建文件夹。为文件夹命名
resources。右键单击新文件夹并选择测试资源。该文件夹将标有 图标
。
单击“应用”保存更改并关闭对话框。
感谢您的反馈意见!